
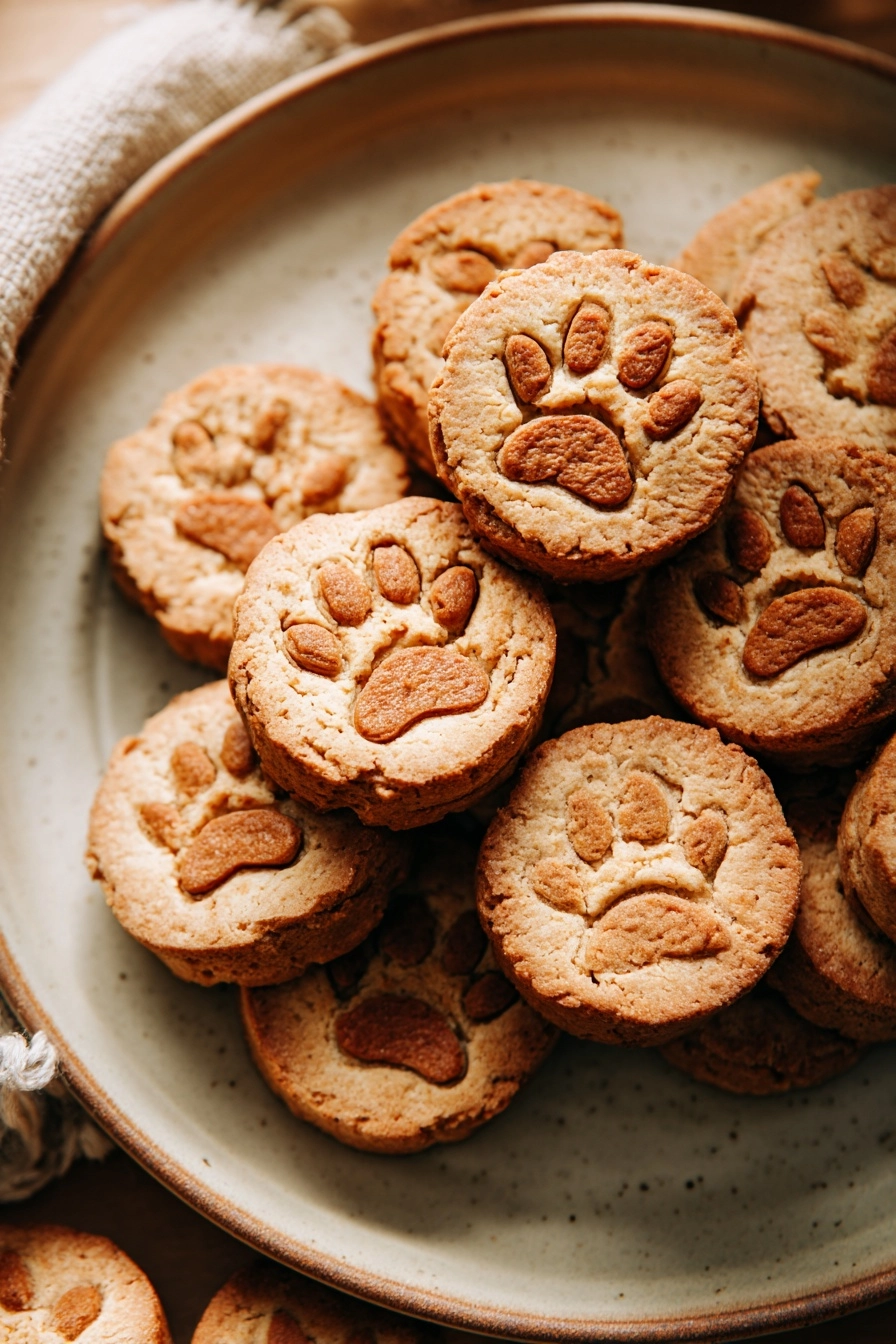
Vet-Friendly Homemade Dog Biscuits
As a devoted dog mom, I know how important it is to keep our furry friends happy and healthy. That’s why I’m excited to share this recipe for vet-friendly homemade dog biscuits. These simple, wholesome treats are not only easy to whip up, but they’re also packed with flavors that your pup will adore. Perfect for special occasions like birthdays or just because, these biscuits have a delightful crunch and a savory taste that will make tails wag. Plus, they’re beginner-friendly, so you can make them even on your busiest days!
Why You’ll Love This Vet-Friendly Homemade Dog Biscuits
These vet-friendly homemade dog biscuits are a game-changer for busy pet parents! They’re incredibly easy to make, requiring just a few simple steps. Your furry friend will love the delicious peanut butter flavor, making them a hit for dogs of all ages. Plus, they’re perfect for the whole family—kids can help cut out shapes! And the best part? You can make a big batch ahead of time, ensuring you always have a healthy treat on hand for your pup.
Easy to Make
With just a handful of ingredients and straightforward steps, you’ll find this recipe a breeze, even on your busiest days.
Delicious Flavor
The combination of peanut butter and broth creates a savory treat that dogs can’t resist. It’s a flavor explosion in every bite!
Family-Friendly
These biscuits are not just for dogs; they’re a fun activity for the whole family. Kids will love helping out in the kitchen!
Make-Ahead Friendly
Prepare a large batch and store them for later. You’ll always have a healthy snack ready for your furry friend!
Ingredients for Vet-Friendly Homemade Dog Biscuits
Main Ingredients
- Whole Wheat Flour: This forms the base of the biscuits, providing a healthy source of carbohydrates and fiber.
- Rolled Oats: These add texture and are great for digestion, making them a wholesome addition to your pup’s diet.
- Peanut Butter: Unsweetened and dog-safe, peanut butter is a favorite among dogs and adds a rich flavor.
- Chicken or Beef Broth: Low sodium broth enhances the taste and keeps the biscuits moist.
- Egg: This acts as a binding agent, helping to hold the ingredients together while adding protein.
Optional Add-Ins
- Pumpkin Puree: Swap out peanut butter for pumpkin for a different flavor and added nutrients.
- Carrots: Finely grated carrots can be mixed in for extra crunch and vitamins.
- Sweet Potatoes: Mashed sweet potatoes can be used for a naturally sweet flavor that dogs love.
Ingredient Notes
- Substitutions: If your dog has allergies, consider using oat flour or almond flour instead of whole wheat flour.
- Recommended Brands: Look for natural peanut butter without added sugars or xylitol, which is toxic to dogs.
- Fresh vs Frozen: Fresh ingredients are always best, but you can use frozen broth if needed; just thaw it before use.
Kitchen Equipment
- Mixing Bowl: A large bowl for combining ingredients; a smaller bowl works too.
- Rolling Pin: For rolling out the dough; a wine bottle can be a fun alternative!
- Cookie Cutters: Use any shape you like; a knife can also cut the dough into squares.
- Baking Sheet: A standard baking sheet lined with parchment paper is ideal.
- Oven: Essential for baking; a toaster oven can work for smaller batches.
How to Make Vet-Friendly Homemade Dog Biscuits
Step 1: Prepare the Ingredients
Start by gathering all your ingredients. Measure out the whole wheat flour, rolled oats, peanut butter, chicken or beef broth, and egg. It’s helpful to have everything ready to go. Preheat your oven to 350°F (175°C) so it’s hot and ready when your biscuits are formed. This step is crucial for achieving that perfect golden brown color!
Step 2: Mix or Assemble
In a large mixing bowl, combine the whole wheat flour and rolled oats. Stir them together until they’re well mixed. Next, add the peanut butter, broth, and egg to the dry ingredients. Use a sturdy spoon or your hands to mix everything until a dough forms. It might be a bit sticky, but that’s okay! If it’s too dry, add a splash more broth.
Step 3: Cook or Bake
Once your dough is ready, sprinkle some flour on a clean surface. Roll out the dough to about 1/4 inch thick. This thickness is perfect for baking. Use cookie cutters to cut out fun shapes, or simply cut the dough into squares with a knife. Place the shapes on a baking sheet lined with parchment paper. Bake in your preheated oven for 20-25 minutes. Keep an eye on them; they should turn golden brown. A good cue is when your kitchen starts to smell like a peanut butter cookie!
Step 4: Finish and Garnish
After baking, remove the biscuits from the oven and let them cool on the baking sheet for a few minutes. Then, transfer them to a wire rack to cool completely. This step is important because it helps them firm up. You can leave them plain, or if you’re feeling fancy, drizzle a little melted dog-safe peanut butter on top for an extra treat!
Step 5: Serve
Once the biscuits are completely cool, they’re ready to serve! Treat your furry friend to one of these delicious vet-friendly homemade dog biscuits. Watch their tail wag with excitement! Store any leftovers in an airtight container to keep them fresh. Your pup will be begging for more in no time!
Expert Tips for Success
- Use Fresh Ingredients: Fresh ingredients enhance flavor and nutrition. Always check the expiration dates on your peanut butter and broth.
- Don’t Overcook: Keep an eye on your biscuits while baking. Overcooking can lead to hard treats that are tough for your dog to chew.
- Measure Accurately: Use precise measurements for the best results. Too much flour can make the dough dry.
- Follow Timing Carefully: Stick to the baking time. Every oven is different, so check for that golden brown color.
- Common Pro Tips: If the dough is too sticky, add a bit more flour. For a fun twist, try different cookie cutter shapes!
Recipe Variations for Vet-Friendly Homemade Dog Biscuits
Healthier Version
- Replace half of the whole wheat flour with oat flour for a lighter texture.
- Add mashed bananas for natural sweetness and extra nutrients.
- Incorporate flaxseed meal for added omega-3 fatty acids.
Vegetarian Version
- Use vegetable broth instead of chicken or beef broth.
- Substitute peanut butter with almond butter for a nutty twist.
- Add finely chopped spinach or kale for a nutrient boost.
Gluten-Free Version
- Swap whole wheat flour with a gluten-free flour blend or coconut flour.
- Ensure that the peanut butter and broth are certified gluten-free.
- Add a bit of xanthan gum to help bind the ingredients together.
Spicy Version
- Add a pinch of cinnamon or ginger for a warm flavor that dogs enjoy.
- Mix in a small amount of turmeric for its anti-inflammatory properties.
- Use a dash of cayenne pepper for a little kick, but be cautious with the amount!
Extra Indulgent Version
- Drizzle melted carob or dog-safe chocolate over the cooled biscuits for a special treat.
- Incorporate shredded cheese into the dough for a cheesy flavor.
- Top with a dollop of yogurt before serving for a creamy finish.
What to Serve With Vet-Friendly Homemade Dog Biscuits
Side Dishes
- Serve with a side of fresh carrot sticks or apple slices for a crunchy treat.
- Pair with a small bowl of plain yogurt for a creamy complement.
Sauces and Toppings
- Drizzle with a bit of melted dog-safe peanut butter for extra flavor.
- Top with a dollop of pumpkin puree for a nutritious boost.
Drinks
- Offer fresh water or low-sodium chicken broth as a refreshing drink.
- Consider a dog-friendly smoothie made with bananas and yogurt.
Desserts
- Finish off with a small scoop of dog-safe ice cream for a special treat.
- Try frozen fruit like blueberries or strawberries as a sweet snack.
Storage Instructions
Refrigerator
- Store the biscuits in an airtight container to keep them fresh.
- They can last up to two weeks in the refrigerator.
Freezer
- For longer storage, freeze the biscuits in a single layer on a baking sheet.
- Once frozen, transfer them to a freezer-safe bag or container.
- They can be stored in the freezer for up to three months.
Reheating
- To serve frozen biscuits, simply thaw them at room temperature for a few hours.
- You can also warm them in the microwave for a few seconds, but avoid overheating.
- Always check the temperature before giving them to your dog to ensure they’re not too hot.
Common Mistakes to Avoid
- Using sweetened peanut butter: Always choose unsweetened peanut butter, as sweeteners can be harmful to dogs.
- Not measuring ingredients accurately: Too much flour or broth can affect the dough’s consistency, leading to hard or crumbly biscuits.
- Skipping the cooling step: Allowing the biscuits to cool completely helps them firm up and makes them easier for your dog to chew.
- Overbaking: Keep an eye on the biscuits to prevent them from becoming too hard; they should be golden brown but not burnt.
FAQs about Vet-Friendly Homemade Dog Biscuits
Can I use different types of flour?
Absolutely! You can experiment with various flours based on your dog’s dietary needs. If your pup has a wheat allergy, consider using oat flour or almond flour. Just keep in mind that different flours may alter the texture slightly, so you might need to adjust the liquid ingredients accordingly.
How long do these biscuits last?
When stored in an airtight container, these vet-friendly homemade dog biscuits can last up to two weeks in the refrigerator. If you want to keep them longer, freezing is a great option. They can be stored in the freezer for up to three months!
Are these biscuits suitable for all dogs?
While these biscuits are generally safe for most dogs, it’s always best to consult your vet before introducing new treats, especially if your dog has specific dietary restrictions or health issues. Each dog is unique, and your vet can provide personalized advice.
Can I freeze the biscuits?
Yes, you can freeze these biscuits! After baking, let them cool completely, then place them in a single layer on a baking sheet to freeze. Once frozen, transfer them to a freezer-safe bag or container. Just thaw them at room temperature before serving.
What if my dog has allergies?
If your dog has allergies, it’s crucial to read ingredient labels carefully. You can substitute ingredients like peanut butter with alternatives such as pumpkin puree or almond butter. Always consult your vet for the best options tailored to your dog’s specific allergies.
Recipe Card for Vet-Friendly Homemade Dog Biscuits
| Prep Time | 15 minutes |
|---|---|
| Cook Time | 25 minutes |
| Total Time | 40 minutes |
| Servings | 24 biscuits |
| Calories | 50 per biscuit |
Ingredients
- 2 cups whole wheat flour
- 1/2 cup rolled oats
- 1/2 cup peanut butter (unsweetened)
- 1/2 cup chicken or beef broth (low sodium)
- 1 egg
Instructions
- Preheat your oven to 350°F (175°C).
- In a large bowl, mix together the whole wheat flour and rolled oats.
- Add the peanut butter, broth, and egg to the dry ingredients and mix until a dough forms.
- Roll out the dough on a floured surface to about 1/4 inch thick.
- Use cookie cutters to cut out shapes and place them on a baking sheet lined with parchment paper.
- Bake for 20-25 minutes or until golden brown.
- Let the biscuits cool completely before serving them to your dog.
Notes
- Store the biscuits in an airtight container for up to two weeks.
- Feel free to substitute the peanut butter with pumpkin puree for a different flavor.
- Always check with your vet before introducing new treats to your dog’s diet.
Enjoy Making Vet-Friendly Homemade Dog Biscuits
Making these vet-friendly homemade dog biscuits is not just about treating your furry friend; it’s about creating joyful moments in the kitchen. Watching your pup’s tail wag as they enjoy a wholesome snack you made with love is truly rewarding. I encourage you to try this recipe and share your experience! Did your dog love them? What fun shapes did you create? Your feedback means the world to me, so please leave a review or comment below. Let’s celebrate our furry companions together with these delightful treats!
Print
Vet-Friendly Homemade Dog Biscuits: Easy Recipes Inside!
- Prep Time: 15 minutes
- Cook Time: 25 minutes
- Total Time: 40 minutes
- Yield: 24 biscuits 1x
- Category: Dog Treats
- Method: Baking
- Cuisine: Pet Food
- Diet: Gluten Free
Description
A simple and healthy recipe for homemade dog biscuits that are vet-approved and perfect for your furry friend.
Ingredients
- 2 cups whole wheat flour
- 1/2 cup rolled oats
- 1/2 cup peanut butter (unsweetened)
- 1/2 cup chicken or beef broth (low sodium)
- 1 egg
Instructions
- Preheat your oven to 350°F (175°C).
- In a large bowl, mix together the whole wheat flour and rolled oats.
- Add the peanut butter, broth, and egg to the dry ingredients and mix until a dough forms.
- Roll out the dough on a floured surface to about 1/4 inch thick.
- Use cookie cutters to cut out shapes and place them on a baking sheet lined with parchment paper.
- Bake for 20-25 minutes or until golden brown.
- Let the biscuits cool completely before serving them to your dog.
Notes
- Store the biscuits in an airtight container for up to two weeks.
- Feel free to substitute the peanut butter with pumpkin puree for a different flavor.
- Always check with your vet before introducing new treats to your dog’s diet.
Nutrition
- Serving Size: 1 biscuit
- Calories: 50
- Sugar: 1g
- Sodium: 10mg
- Fat: 2g
- Saturated Fat: 0.5g
- Unsaturated Fat: 1.5g
- Trans Fat: 0g
- Carbohydrates: 8g
- Fiber: 1g
- Protein: 2g
- Cholesterol: 10mg
Keywords: homemade dog biscuits, vet-friendly dog treats, healthy dog snacks